Certificate - Update HTTPS Certificate with Globaleaks
About
This document shows you how to update the HTTPS certificate used by the Globaleaks whistleblower platform. The process includes exporting the certificate from pfSense and uploading it in the correct order to Globaleaks.
PfSense, Export Certificate:
-
Navigate to your pfSense admin interface and sign in with your admin credentials.
-
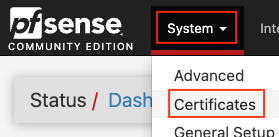
From the top menu: Click System and click Certificates again to view the list of certificate authorities and certificates stored in pfSense.
-
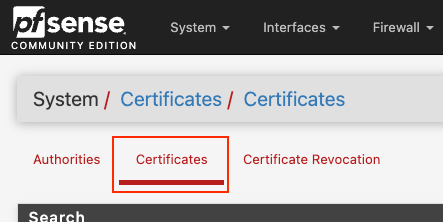
Scroll all the way down to the bottom of the page and find and click Add/Sign to create a new certificate. Click it.

-
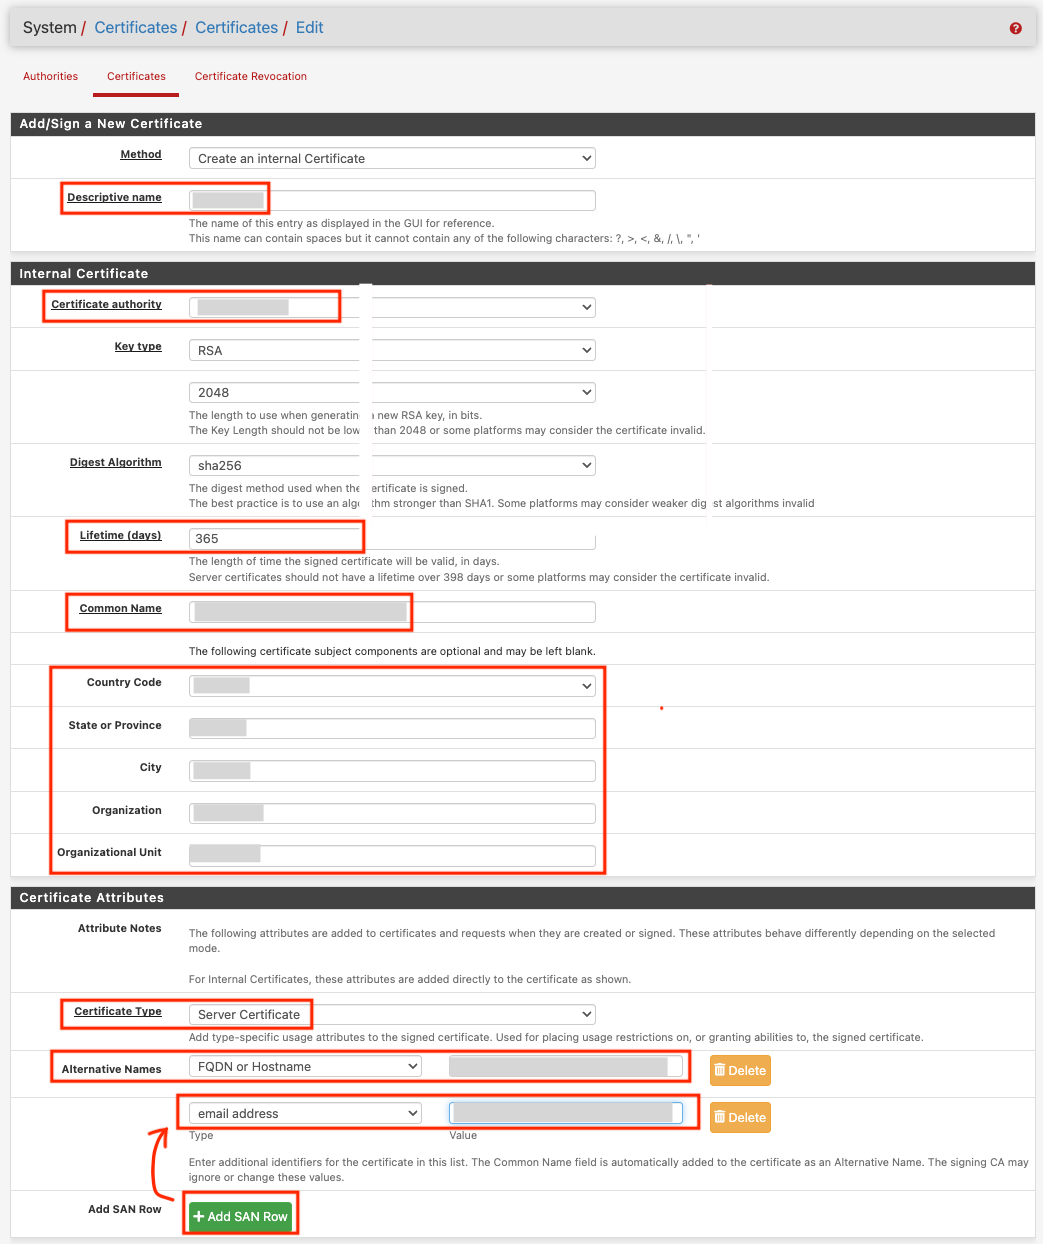
Fill the required fields such as Name, Certificate Authority, Key Type, Lifetime, Common Name, etc.. Click Save, then Yes when prompted to confirm.
-
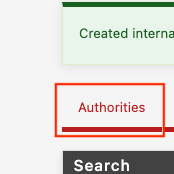
Scroll all the way down to the bottom of the page again and find The one you just made and click the Export Key button to download the certificate. Then click Authorities at the top of the Certificates page. Scroll down to find the internal company Certificate Authority entry. Click Export CA to download the CA certificate (usually .crt).


Globaleaks, Upload Certificate Files:
- Open your Globaleaks Admin Portal in a browser.
- Enter your administrator username and password to access the admin dashboard.
This website requires patients and a lot of reloading. If things are slow, reload.
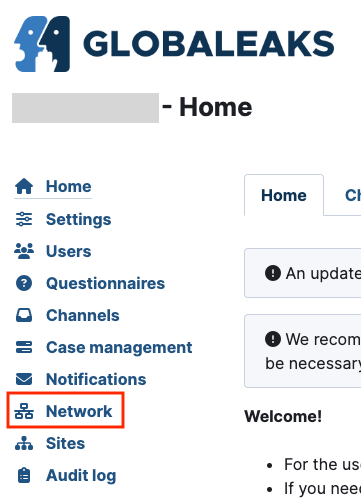
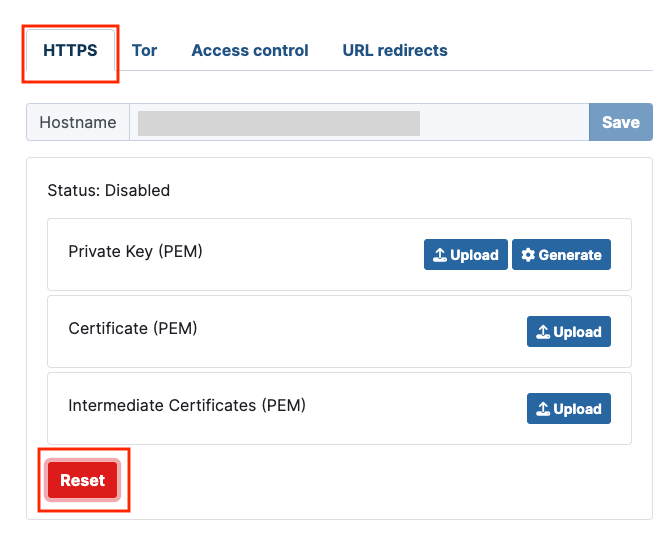
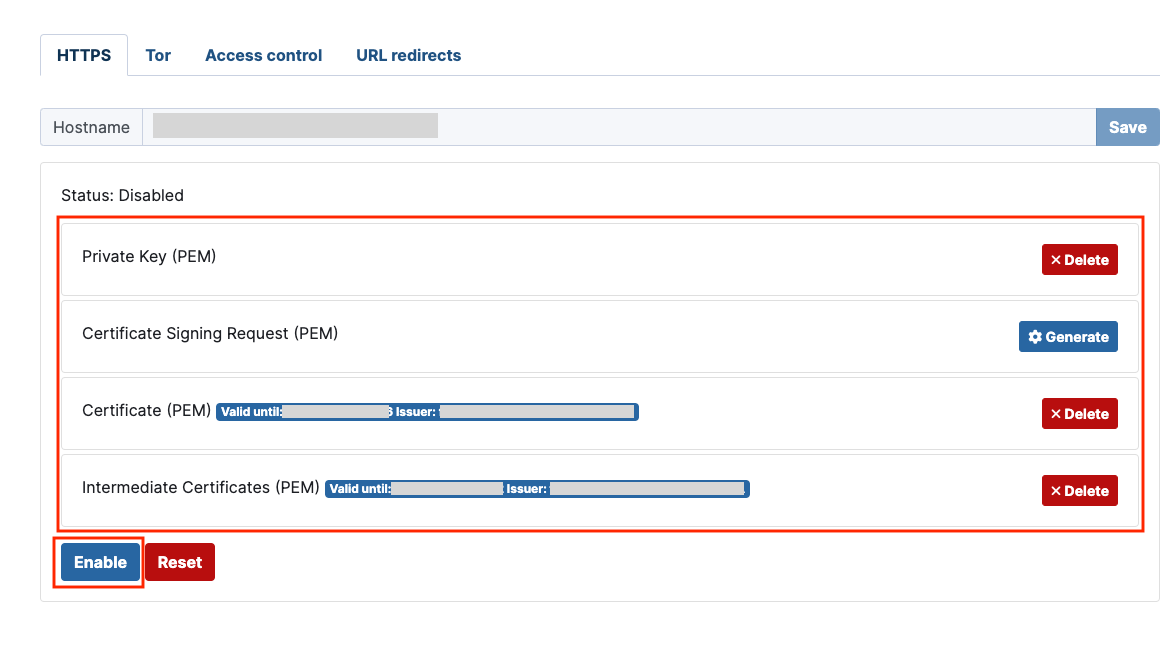
- Open Network → HTTPS tab and Reset. From the admin sidebar, click Network. Ensure you are in the HTTPS tab. Click Reset to clear the fields and prepare for a new certificate upload. Refresh the page once the reset completes.
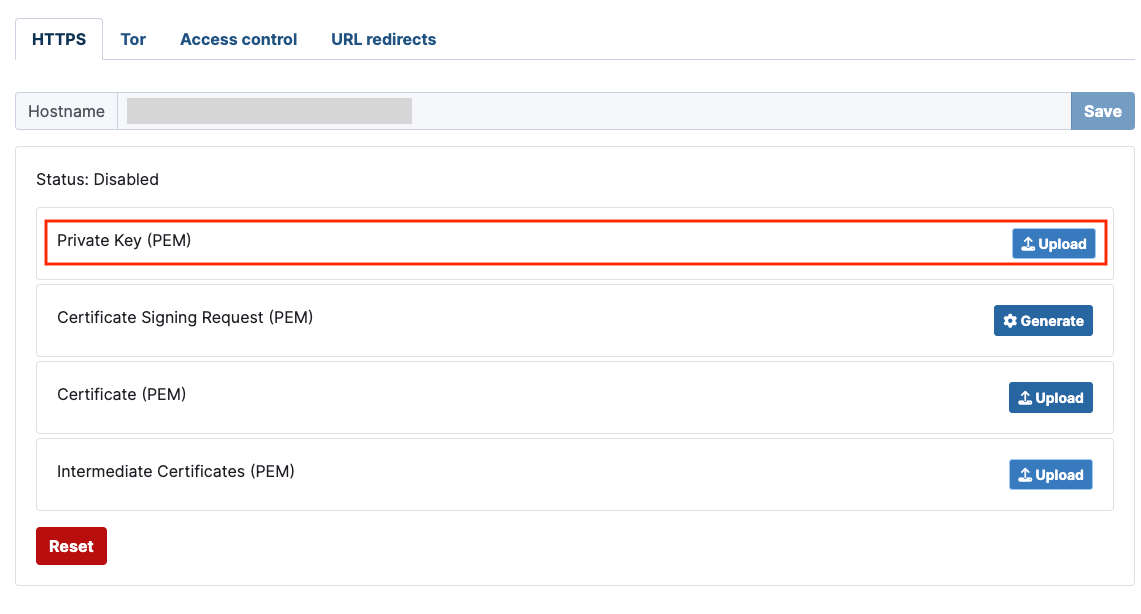
The order of uploads are important in this case. Make sure to follow the steps.
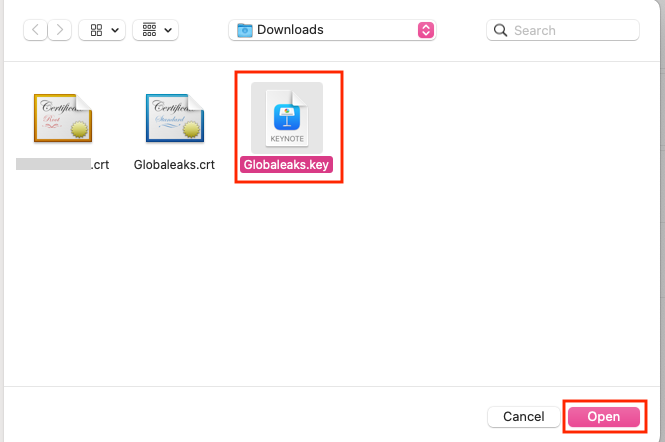
-
Look for Private Key and click Upload. This must be the first upload to be done! Select the Globaleaks.key file you exported from pfSense. Click Open to upload.
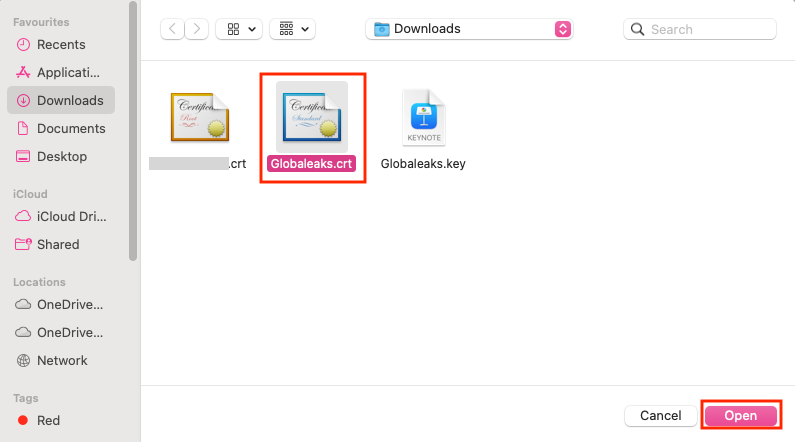
-
Then upload to the Certificate (PEM) second. In the Certificate (PEM) field, click Upload. Select the Globaleaks.crt file you exported from pfSense. Click Open to upload.
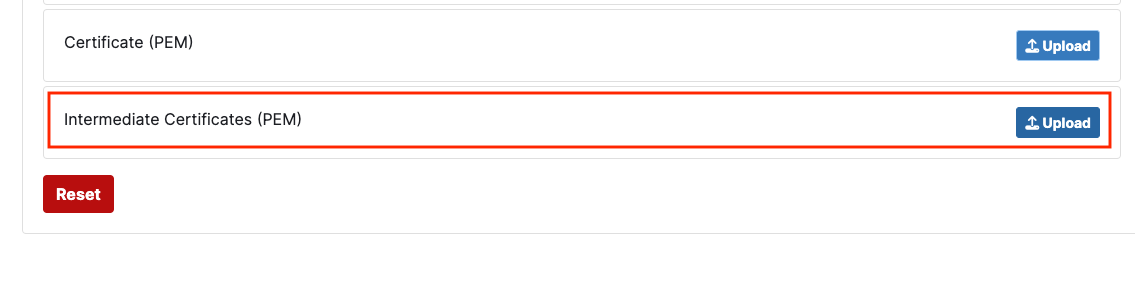
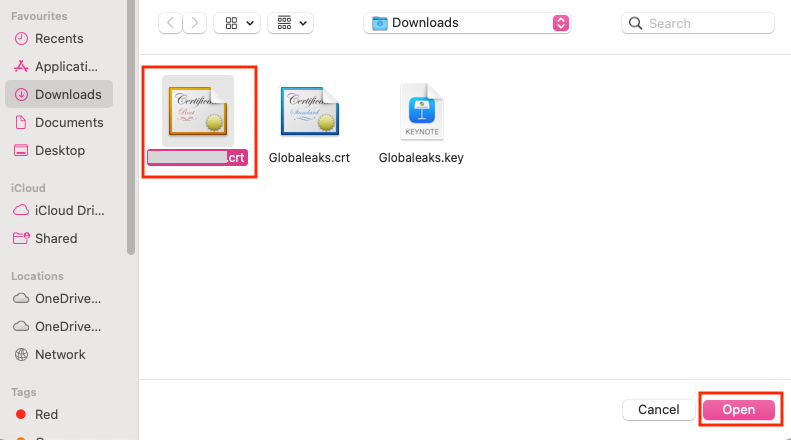
-
Then upload to the Intermediate Certificates (PEM) third. Select the Company.crt (CA certificate) you exported earlier. Click Open to upload.
-
After all three uploads are complete, the interface should display a summary of the certificate details (issuer, valid dates, etc.). Click Enable to apply the certificate. Wait about 1 minute then refresh the page to confirm the changes have taken effect.
-
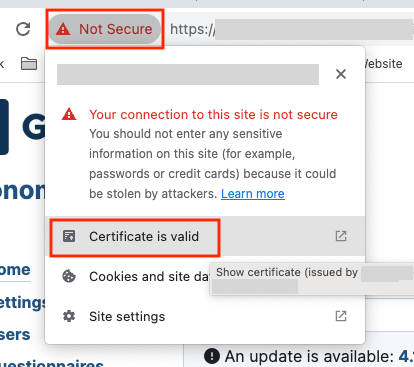
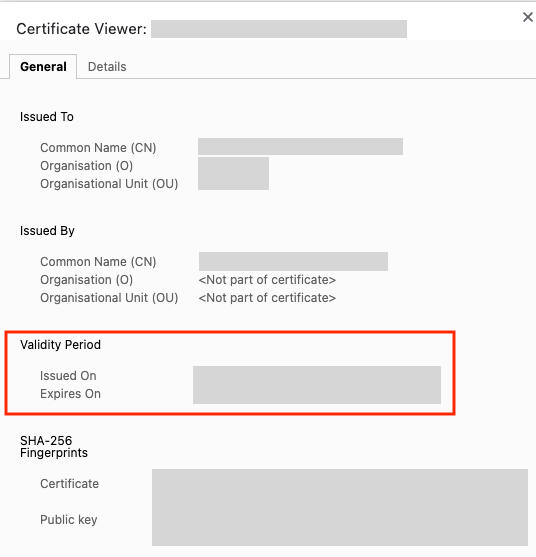
Then look at the browser address bar. If the HTTPS certificate is installed correctly, the “Not secure” warning will be gone. You can also click the padlock icon (where “Not secure” was) to view certificate details. Another method is to copy the URL into a new tab and press Enter. The page should load securely without warnings.
And you are done. 😄
Continue here:
Active Directory - Change Hostname in AD after Certificate Update
See you again next year!